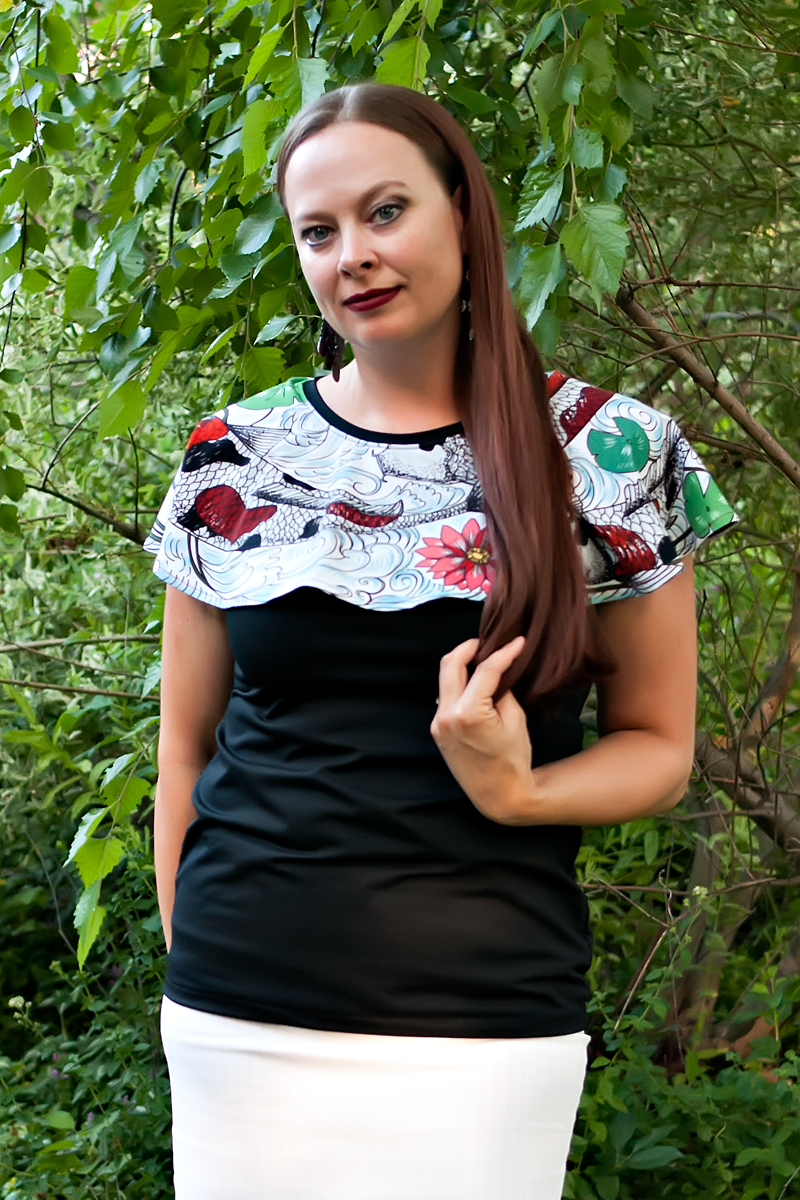
The new rounds are up for pre-order at RP Custom Fabrics, and she called this round the “Fun Rounds“. I have to agree. There are some really pretty and fun prints in it. I have several to get sewed up, so hopefully I will get them done soon.
We are entering the week of the state baseball tournament and the girls’ national softball tournament, so I might be a bit busy. BUT, then we are pretty much done for three or four weeks, and we get precious, precious Free Time. Oh Free Time, how I have missed thee!
So, cape tops are pretty cool, aren’t they? Here is a bit of discussion on how I made this top.

There are several patterns that you can use to achieve this look. Or, if you already have a tank top or long-sleeved pattern, a circle skirt or cape pattern, you can just mash them together. You just need to measure the neckline and adjust your cape/circle to match up to the measurements you want.
This cape top was open for several inches, and I also had a pretty thick hem (about 1″). I didn’t want the hem to curl in, so that gave it some extra weight.
I made the basic pattern for the cape, which is basically just a circle skirt. The front will fall at different lengths front-to-back depending on how robust your bust may be. If you want to to be higher in the front, just shave some inches off that part of the cape. You could also just keep the entire thing as a circle with no opening in the front at all, which is what I did for the Koi circle top.
Fabric needed: A drapey knit is best, though I did use cotton lycra on the Koi one. Generally, a heavy cotton lycra won’t have the right amount of “fall” to it. You need a bamboo lycra, rayon lycra or jersey type knit. I did make sure I had a slippery poly knit underneath the Koi so it would not stick to it. I think that worked out pretty well.
When I make circle skirts/cuts I use this handy little tool. I measure the opening, divide it in fourths and then use the corresponding measurement on this tool to make the pattern. If you are keeping an opening in the front, then subtract that from the measurement, making sure to include a hem allowance for the side seam.

To add this onto the pattern (I used the Wardrobe by Me Builder T-shirt):
- Hem the bottom edge and the side edges (if open). The side edge on the top above was a 1″ hem.
- Baste it to the neckline, without stretching it. Make sure it hits at the same spot on either side of the front neckline if open, so it won’t be uneven on you looking straight on. The basting makes sure it won’t shift when you add on the neckband, so don’t skip this part.
- Add the neckband, and continue on with the rest of the pattern.
It is a really cute and easy way to use round printed panels. The length on this one is about 7″ and I used the 24″ panel.
This panel comes in a variety of sizes from small to large, and some of the ladies in the test group made dresses from it. They turned out lovely. I really was happy to be able to sample sew up this panel, since the print is so pretty. If you want to make a cape top like this, I would recommend ordering it in the bamboo lycra for a bit better drape.
Now to sew up the rest of the rounds!


Very chic Stacy. And thanks for the heads up on circle skirt tool. Love seeing your designs
Thank you! I have used that tool quite extensively over the years to make circle skirts for my daughter, too. It works so well.
Looking good! That circle making tool looks really cool.
Thanks, Rachel! I love that tool. I have actually bought two, since I broke one after dropping it. That is the only thing about it I don’t like. It breaks with clumsy people like me!
Your capes are beautiful! I particularly like the one with the maroon skirt 🙂
Thank you! That is one of my favorite outfit sews. 🙂
This is so cute! It’s a very elegant-looking top. I love to sew for my girls; I may have to look into that circle-cutting tool. I didn’t even know something like that existed!
Thanks, Karen! The cutting tool is very useful. I also use the straight edge for cutting with my rotary cutter.